
Hi, I’m higashi.
In this time, I introduce how to changing the designated color to other color.
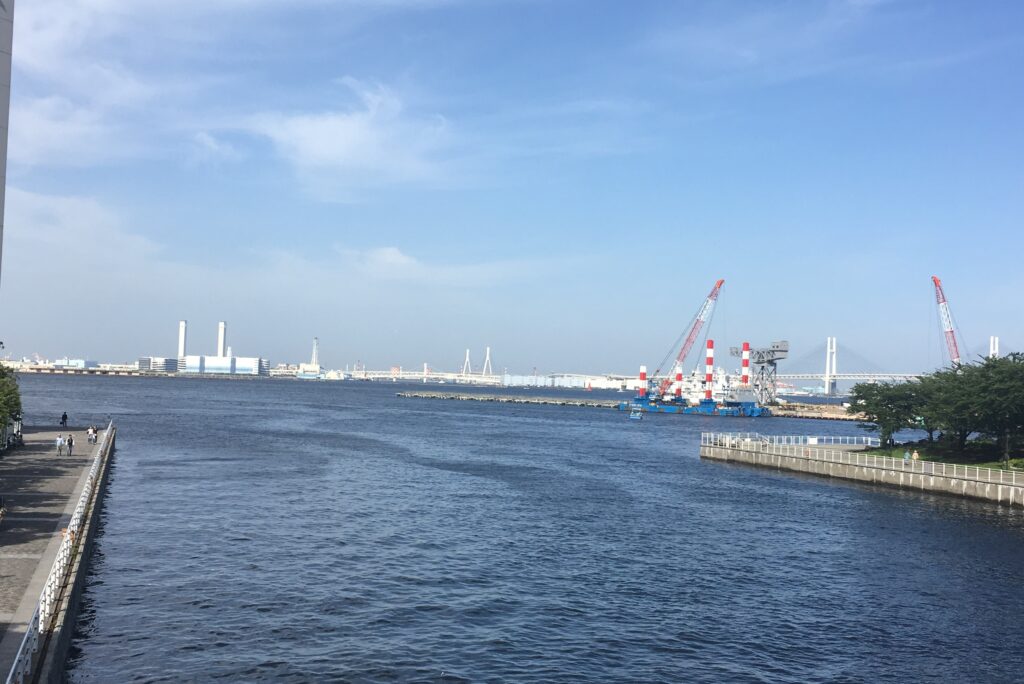
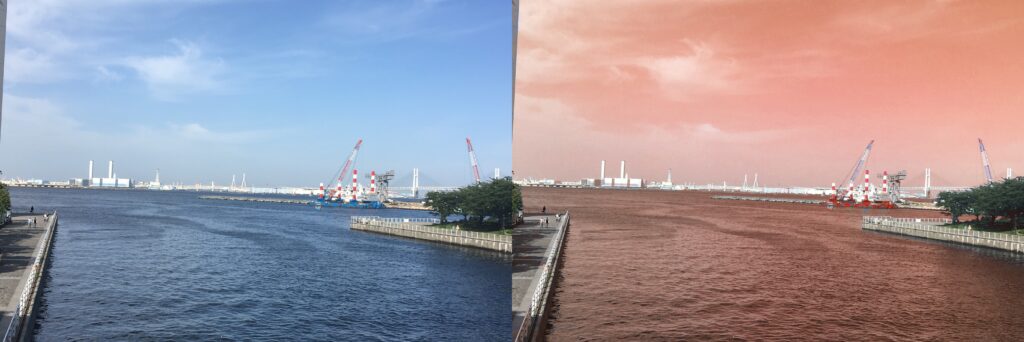
More specifically, I change blue sky image to red sunset sky image as shown below.
★Original Image
★After Processing Image
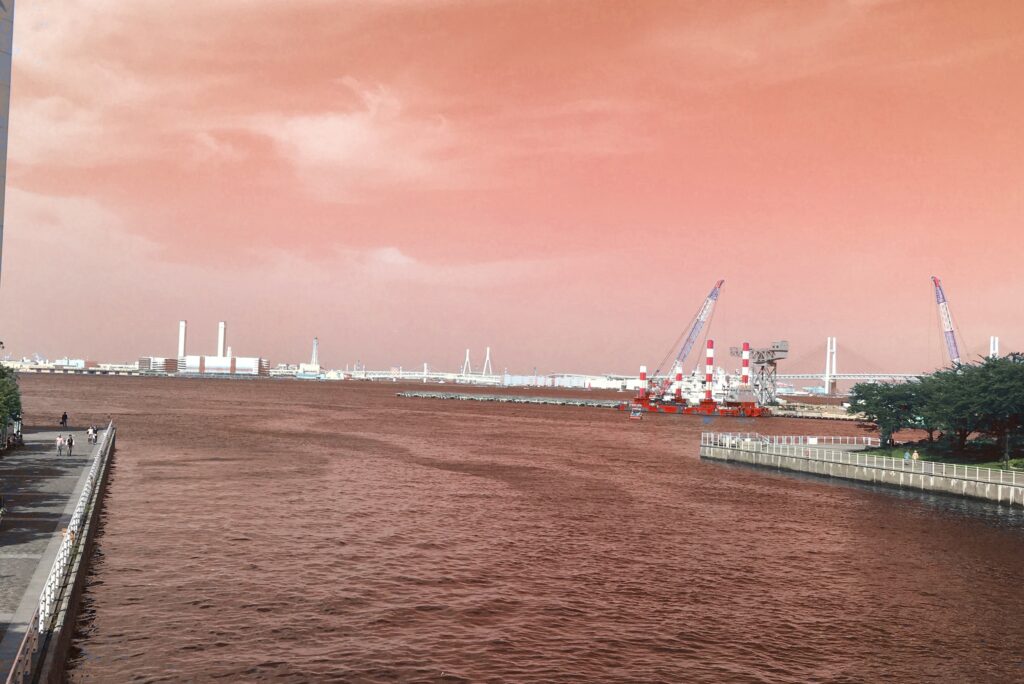
I think you can confirm sky and sea color is changed but tree color is remained.
By understanding the processing details, you can change the colors freely.
So, let’s get started!!
About HSV Color Space
At first, to understand how to convert color you should know about HSV color space.
Prerequisite, all color is represented by H,S and V.
The following images show the colors represented when H, S, and V are changed respectively.
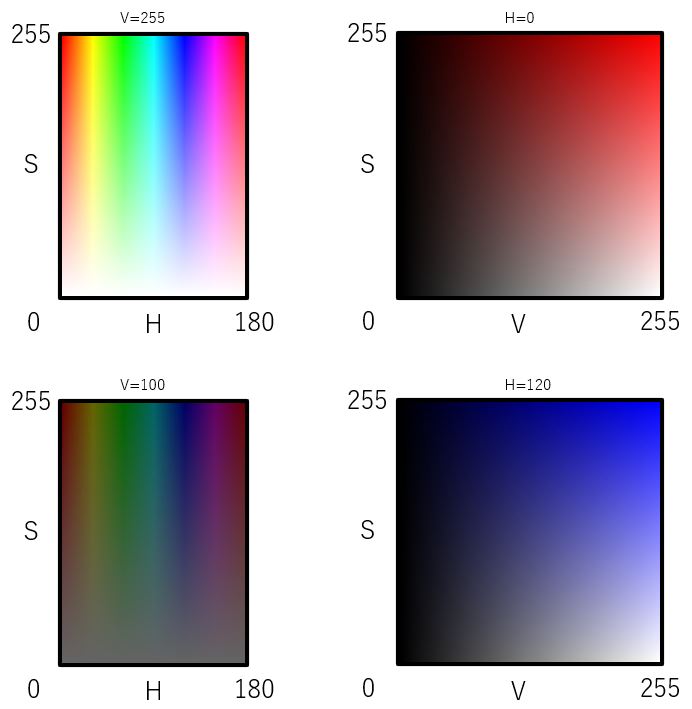
H stands for hue, S for saturation, and V for value (brightness).
In short, you can change the color by adjusting the H on your image.
Color Conversion Work Summary
As I mentioned at the beginning of this article, I want to change blue to red.
Let’s check the H and corresponding color again.
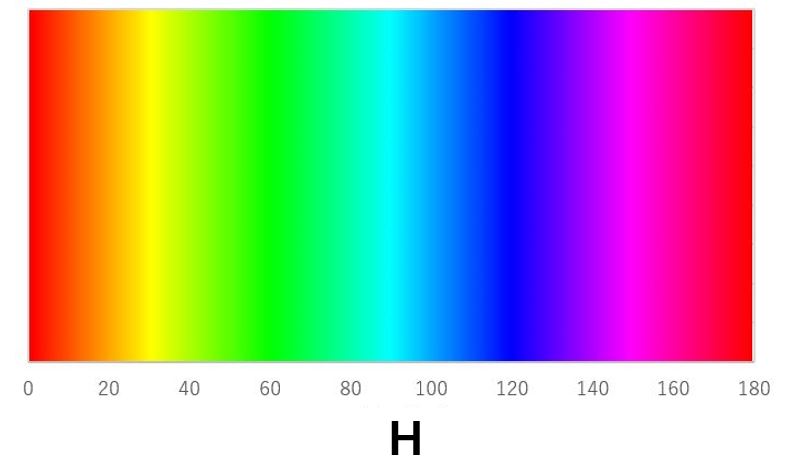
The sky and sea’s color has about 100~110 of H value.
So, by changing the H value of the pixel that has these 100~110 H value, you can change the blue region to red region.
The program will be shown below conduct this work exactly.
Sample Code of Changing Designated Color
The sample code is below.
#import library
import cv2
import numpy as np
#input information
#file name of original image
file_name='sample.jpg'
#specify the H value to be converted
hbase=106
#specify a range of H values
hupper=6
hlower=6
#offset value of H
hdelta=-100

#start process
#load image
img=cv2.imread(file_name,cv2.IMREAD_COLOR)
#convert color
imghsv=cv2.cvtColor(img, cv2.COLOR_BGR2HSV)
hmax=hbase+hupper
hmin=hbase-hlower
h=imghsv[:,:,0]
h=np.where((h<hmax) & (h>hmin),h+hdelta,h)
imghsv[:,:,0]=h
#output image
img2=cv2.cvtColor(imghsv, cv2.COLOR_HSV2BGR)
cv2.imwrite('change_color.jpg',img2)
I explain the below variables appeared in the program.
hbase=106
hupper=6
hlower=6
“hbase” means staring point of H.
And hbase + hupper means maxmun value of H that is converted.
And hbase – hupper means minimum value of H that is converted.
So, in this case, the pixel that has 100(hbase – hupper)~112(hbase + hupper) H value is converted.
And “hdelta” designate the offset value of H.
So, H of the pixel specified above is conver to “H+hdelta”.
In this case, since “hdelta=-100”, after processing image has original H – 100.
Finally I display the original and after processing images again.
It looks good!!
That’s all. Thank you!!


コメント